
In this guide we explain how the Incogniton Proxy Shop works. In the Proxy Shop you can purchase your proxies directly via the application, after which they will be automatically imported. After, you can simply add them to your browser profiles. We will show you how to buy proxies in just a few steps.
Step 1: Go to the proxy shop in Incogniton. You can access in two ways: via Proxy shop or via Proxy Management in the left-side menu.
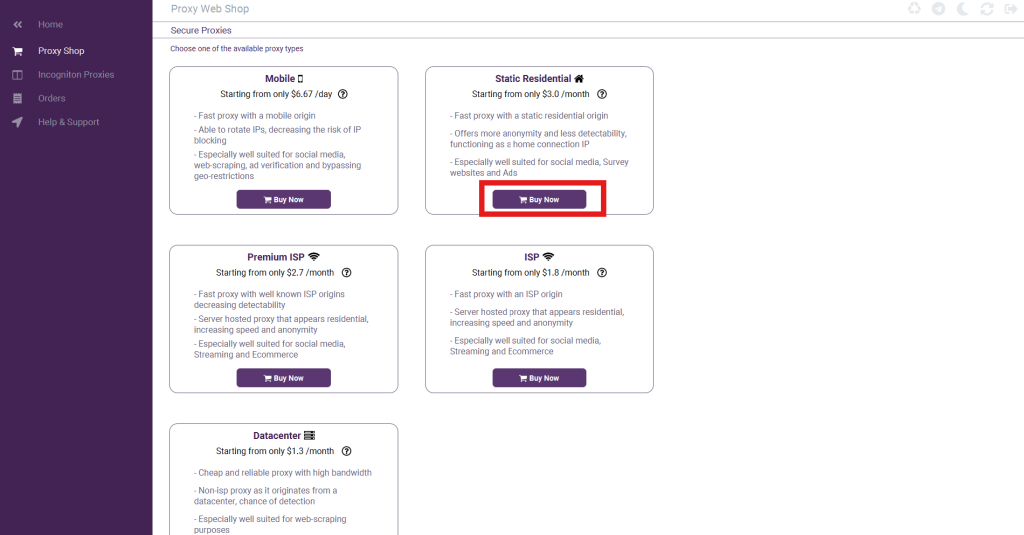
Step 2: Now you’ll see an overview of the available proxies and their specifications. Click on Buy Now of the preferred proxy.
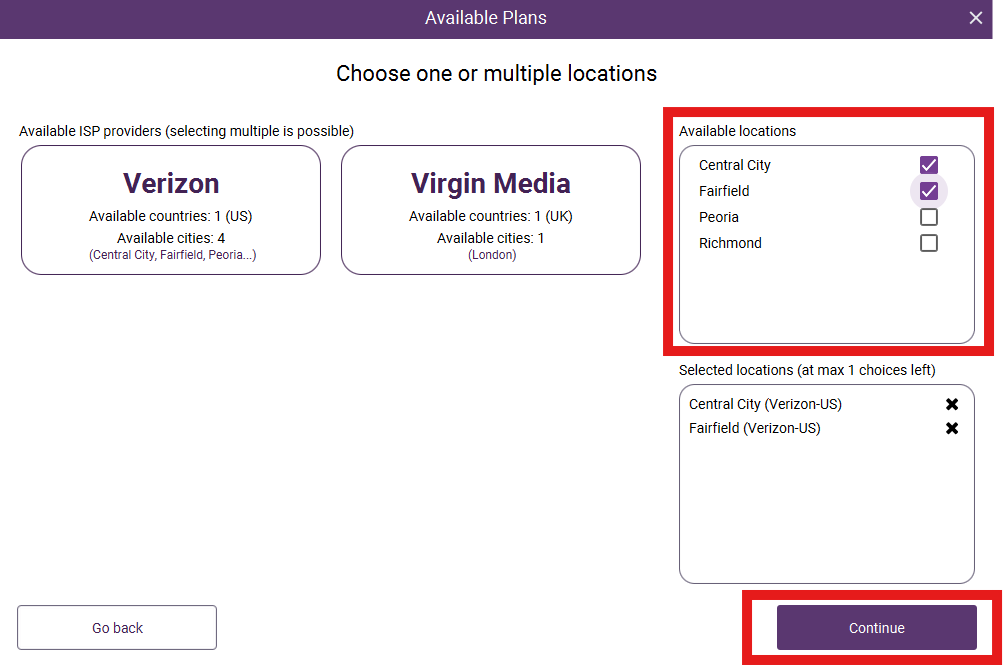
Step 3: Next, you’ll see an overview of the available plans. Choose the plan you want by clicking on Buy. Then choose an ISP provider, select the locations you want and click on Continue.
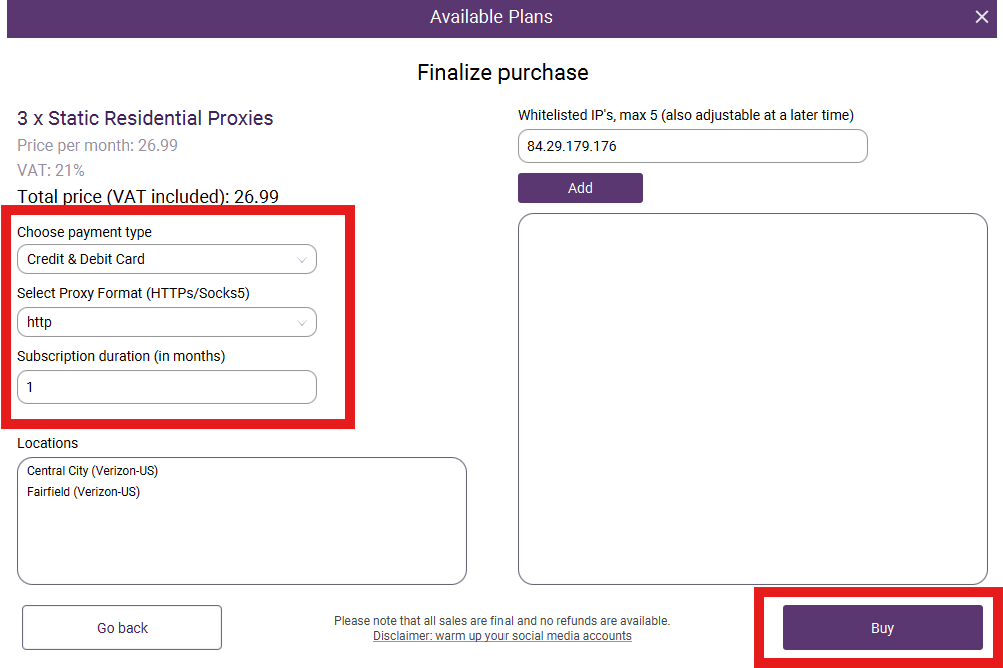
Step 4: Now you can finalize your purchase. Choose the payment type, proxy format and subscription duration and click on Buy to make the payment. Afterwards navigate to the proxy shop again and click on Incogniton Proxies. Here you’ll see the proxy you bought.
Step 5: Now it’s time to use the proxy in your browser profiles. Create a new profile or edit an existing one and go to Proxy – Proxy Management. Select the proxy and click on Create profile or Update profile and you can start browsing with your new proxy!

Like to know how to renew your subscription? Read about it in this article!
If you still have any questions, please don’t hesitate to contact our support department!


